Hello, welcome to "Kindred Kreations"

This blog is about our life at home, and away from home... everyday happenings, and special occasions. We enjoy a variety of pastimes, but our main joy is making "Kindred Kreations". Thank you for joining us in our journey of growing together through faith, family, love for learning, projects, and more.


Saturday, December 31, 2011

Treat boxes for our Chistmas dinner

I made these little treat boxes to set at each place setting for our holiday dinner. I was going to turn them into place cards with labels and sentiments but it just didn't happen. I do tend to keep Christmas dinner a bit less formal than Thanksgiving because mommys have so much more do to for Christmas Day. It would have been fun to add more to them, but maybe in this case less is more?


Friday, December 30, 2011

Altered Frame project #2

I needed a personal gift for a couple of  nieces (and nephew with girlfriend) that wouldn't be too complicated to put together. I snapped a few pictures while they were here for Thanksgiving and thought I would put them in a simple frame.
I kept the embellishments simple by using some Prima Flowers and K&Co metal embellishments I had in my collection of goodies. I added a few half pearls and some fibers. The background paper is from DCWV Performance stack. It has a vintage feel that I really like.
The red sentiment is cut from red vinyl using the Home Accents Cartridge. I did have to play around with the size a bit.


Thursday, December 29, 2011

More Vinyl!

I just love using vinyl to add personal touches to items. This particular project is for my girlfriend who loves horses and everything cowgirl. I have known her for years and she introduced me and my family to 4H over 10 years ago. She even talked me into being horse leader for several of them! Good times for sure.
Now of course my girls are grown, but the memories live on and we love to get together and talk about the "good ole days". That often includes sitting out by the barn watching the horses and enjoying a cold beverage.
For this project I pulled out my Old West Cartridge and some pink, tan and brown vinyl. The tags were created from some wood cutouts that I inked and stamped with sentiments from a PBD set. Sorry about the poor photos. I just couldn't get it right.


Wednesday, December 28, 2011

Christmas Tags

Here are a few of the tags I created this season. There were so many to create for the different treats and gifts. Not all of them had photos, but here's a few.
I thought I would enter these in Mary's Cricut Cardz Challenge #98. You really should check out the beautiful tags that were created. I always want mine to look like that, but alas, not this time. Terrific inspiration though.

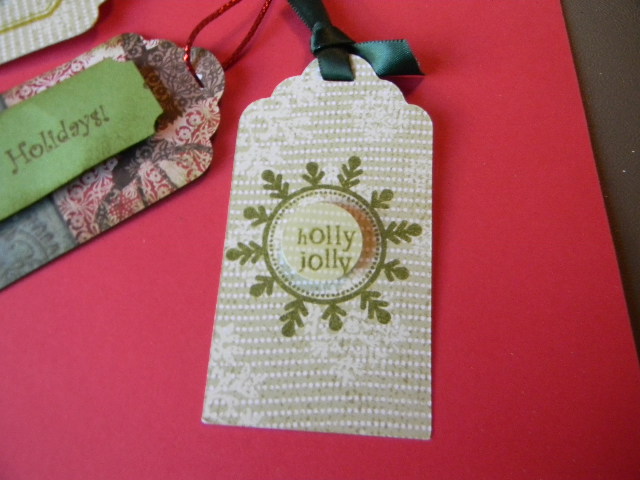
 I used TBBM Cartridge and auto filled the page. The sentiments and ribbon are from PTI.


This next one was for some homemade treats and were cut out with a scallop punch and the sentiment is from a Gooseberry Patch set. I added a bit of stickles too.

Tuesday, December 27, 2011

Altered Frame #1

Happy Tuesday everyone. I am slowly recovering from Christmas weekend. As delightful as it is, I am usually a bit relieved when it comes to an end. Does anyone else feel that way?
I thought I would spend this week posting some projects I completed over the holidays. This first altered frame set was for my sister-in-law.
I kept all of my projects pretty simple this year. I started with some frames from the $1 store. Next,I used some neutral paper and trimmed it to fit inside the frame then embossed it with my Wall Decor Cuttlebug folder set and inked it with some Tim Holtz distressed inks. I used my large circle punch for the photos and my Home Accents Cartridge for the sentiments and cut them in brown vinyl. I simply hot-glued some PTI ribbon cut to length of the frames to attach them together, leaving enough at the top for a loop for hanging. That's it! It was far from perfect, but overall, I am happy with the outcome.


Monday, December 26, 2011

Peachy Keen Challenge

Peachy Keen is having another challenge and this time anything goes as long as it includes Peachy Keen Stamps. I had a gift bag for my girlfriend that also doubled as her Christmas card.  I used the Winter Frolic Cartridge and Peachy Keen's Princess Face Assortment. I cut the little girl at 7 inches, so the layers were pretty easy to work with. I ran some of the pieces thru the Cuttlebug, added some Glossy Accents and gave her some rosy cheeks.  I kept the colors a bit non traditional for Christmas.The sentiment is from Emma's Mixed Holiday Sentiments stamp set.


Sunday, December 25, 2011

Merry Christmas Everyone!

I hope and pray that today is filled with peace, love, joy, no stress and making lots of new and lasting memories!


Here's a couple of pictures of Sara, Seth and our little grandson Cory.We were trying to get pictures for this year's Christmas cards, no easy task with these little wiggly boys!

Saturday, December 24, 2011

Embellished ornament for my crafty friend

Another quick and easy project for my crafty friend (actually the one who introduced me to the Cricut back in January of 2009.
I started with a store-bought wreath ornament. I went to my stash of wooden cutouts that I have had for years (they are from back in the day when my older daughters were in 4H and I was the craft leader.) I decided they would be perfect for stamping. I inked the edges and stamped some crafty sentiments from PBD stamp set. I then added some gems with my IRock tool, then simply hot-glued them to the ornament, added a little bow and called it done. I have a similar one I did earlier and used some buttons and twine too. I made that one for an ornament swap over at PBD's Community blog.


Friday, December 23, 2011

Cranberry Liqueur

My husband and I make homemade Cranberry liqueur each holiday season. It's quite easy to make and so festive looking. This year I added simple tags I made with my Cricut, scallop punch and Tags and Treats stamp set from PBD. The recipe card was made using at PTI die. I used my computer for the recipe and printed it out on avery mailing labels, that way I could just stick them on patterned paper and run the die through my Cuttlebug. The cute litte martini glass is from Emma's Everyday Bingo set. (there are a ton of cute little images on that set.)


Thursday, December 22, 2011

Christmas project for the 4-legged critters!

I have been quite the little elf getting projects accomplished for Christmas, but haven't had the chance to post any. Here's one I completed early on for my grown children's 4-legged friends. I started with some bowls from the $1 store and added some treats. I used vinyl to add the names and cute little doggie bone. I used Sesame Street Font for the letters and Everyday Paperdolls for the bone with the real dial size on. The tags were cut from Joys of the Season cartridge. I found a doggie paper pad on clearance at Joannes sometime last year and so I thought that would be fun to use. The stamp is from MPS Punnylicious set. More projects to come! Hope everyone is almost ready for the big day!

Sunday, December 11, 2011

Spruced up Garland including using Peachy Keen Stamps

The house is finally decorated and I decided the garland in the kitchen needed a little something extra. I was looking thru my collection of extra cutouts and found several gingerbreads already cut out (From My Kitchen Cartridge), so of course I thought they would look adorable with some cute little Peachy Faces. I stamped their faces with the Everyday Character Faces set and embossed them with the cuttlebug. I added some stickles, buttons and twine bows. They are attached with mini clothespins.
I am happy with my improved garland!

Saturday, December 10, 2011

Simple Christmas treat bags.

For today's project I made some treat bags for Sara's choir/drama group. I started with small candy bags and put a few treats in them. I added a 3x3 scored at 1 1/2 for the topper, added a strip of 1x3 to cover staples. The snowman stamp is from PTI Holiday Friendship Jar Fillers set cut out with a scallop punch and the sentiment is from PBD Winter Fun set. I did ink it up a bit, but that's about it since the kids will just be tearing them open!