Hello and Happy Monday!
Ok, I know Mondays aren't always the happiest, but I do have new challenge to announce over at Exploring Cricut and More!
"Back to School" is the theme and all you have to do is create anything school related. Maybe it's a card, or tag, or note to put in a lunch box, perhaps a layout or pocket page for the first day of school. Maybe even a teacher gift or a gift card holder for your favorite student. Really....there are so many possibilities.
I have decided to share with you some bulletin board decor I have created for the boys. I normally only do these boards for the first few years of homeschooling. (it will be different only having the two first graders since Sara has graduated and is starting college)
I used the Create a Friend Cartridge for the word art "Bookworm" and "Back to School", and the Sesame Street Seasons cartridge for the "Read" word art. Since we embrace the classical method of education, our history for this year will be studying the Ancient Times. I thought it would be fun to have a bulletin board to showcase some of our projects and used the Cuttin Up cartridge for the font and the My World cartridge for the images.
Create a Friend Cartridge:
"Bookworm" found on page 8 and cut at 5.0" including the layers and shadow
"Back to School" found on page 4 cut at 5.0" including the layers and shadow
Sesame Street Seasons Cartridge:
"Read" found on page 56 and cut at 3.0" using the word feature
My World Cartridge:
"King Tut" and "Pyramids" found on page 49 and cut at 3.75" using the layer and shadow feature
"Parthenon" found on page 55 and cut at 5.0" using the layer and shadow feature.
For our science pocket chart I used the Cuttin Up Cartridge and cut the letters at 3.0" including the shadow.
Thank you for stopping by today and be sure to enter this week's challenge
Hello, welcome to "Kindred Kreations"
This blog is about our life at home, and away from home... everyday happenings, and special occasions. We enjoy a variety of pastimes, but our main joy is making "Kindred Kreations". Thank you for joining us in our journey of growing together through faith, family, love for learning, projects, and more.
Monday, August 11, 2014
Friday, August 08, 2014
"Our Harvest" for Exploring Cricut and More!
Good Morning My Fellow Crafters!
I am so happy to be posting today for Exploring Cricut and More!
Today's project reflects the wonderful bounty of our California garden.
Zucchini, Summer Squash and Cucumbers oh my!!
The tomatoes and corn are just about ready. The Swiss Chard and Beets are doing wonderfully too.
I have been sending the abundant extras with hubby to work and decided it was time for me to take some as well. Now, hubby is fine with a bag...however, I thought it would be fun to dress up a basket a bit. I work in a small educational bookstore and there are not very many of us, but most of us have big families and appreciate home grown produce.
So, after looking thru some of my "summer" cartridges, I decided on the Garden Soup Cartridge. I loved the "Our Harvest" word art and the basket of veggies.
Images found on page 60 including the layer and phrase feature and cut at 5.0" I did some embossing, added some gems and twine.
Thank you for stopping by, please share with me your garden goodies, I would love to hear about what you grow and even a recipe or two. (I have eaten zucchini just about everyday for weeks)
Also, Monday is the start of a new challenge at Exploring Cricut and More! So please stop by and take a look.
Tuesday, August 05, 2014
Guest Designer for My Creative Time!
Hello everyone and thank you so much for stopping by today. This day is especially exciting for me as I am so honored to be a guest designer over at My Creative Time!
I have been a long time follower of Emma and have had enjoyed her creativeness, encouraging words and wonderful stamps and dies from the very beginning.
Thank you Emma for having me as a guest designer today!
Now on to my projects!
I started with some PTI Vintage Cream cardstock and theBubble Gum Treat Box Die. Next, I used the Hexy Background Stamp to create my own background. Then I used the hexagon stamps found in the newly released You are Fabulous Stamp set to create some fun patterns. (I love the way they coordinate so easily, the Stitched Hexy Dies also coordinate with those stamp sets). For the tags, I used the Stitched Round Tab, Arrow & Tag Dies and again the You Are Fabulous Stamp set for the sentiments.
I used Hero Arts Shadow ink, PT I and Trendy Twine to finish the treat boxes.
Thank you again for taking the time to stop by my little blog today. Have a wonderful weekend!
Monday, August 04, 2014
Winner of the Exploring Cricut and More! Blog Candy!
Hello and happy Monday evening!
The winner of the blog candy from the Christmas in July Blog Hop at Exploring Cricut and More! is....
Linda H said...

Congratulations....I hope you check back with your contact info!
Have a great week everyone!
The winner of the blog candy from the Christmas in July Blog Hop at Exploring Cricut and More! is....
Those tags are adorable! I plan on making tags for Christmas this year, so thanks for the inspiration!
July 28, 2014 at 10:01 AM

Congratulations....I hope you check back with your contact info!
Have a great week everyone!
Monday, July 28, 2014
Christmas in July Blog Hop for Exploring Cricut and More!
What a fun Monday! We have a new challenge at Exploring Cricut and More! and a fun blog hop too!
There are lots of fun goodies that are being given away, so you won't want to miss a thing!
You should have arrived from:
Faith: http://thecraftingprofessor.blogspot.com/
It's Christmas in July and what a way to take a break from summer and think of the cooler days ahead and holiday fun.
Believe it or not I have a little shopping finished and so I thought I would make the tags for the gifts.
I recently purchased the Teddy Bear Parade Cartridge and can I just say the images are too cute. I needed 7 tags and there happened to be 7 images I could use that were either winter or Christmas themed.
The little bears were cut at 2.75" including the layers.
I went a little crazy with the Stickles and Glossy Accents. And of course a Cuttlebug embossing folder and Trendy Twine were the perfect finish.
What's a blog hop without a little blog candy right? These little goodies are sure to help with the holiday spirit! All you have to do is become a follower and leave a comment including your email address for a chance to win.
Next stop is:
Rae Ann: http://joyinart.blogspot.com/
Here is the blog hop line-up in case you get lost along the way:
Annette: http://mymindsdustbunnies.blogspot.com/
Sharon: http://meemeescreations.blogspot.com/
Faith: http://thecraftingprofessor.blogspot.com/
Donna: http://wwwkindredkreations.blogspot.com/
Rae Ann: http://joyinart.blogspot.com/
Emily: http://emilyqueenofallthingscrafty.blogspot.com/
Michelle N.: http://justanutterpapercrafter.blogspot.com/
Christi: www.tidbitsoftexas.com
Liz: http://unikbyyes.blogspot.com/
Tina: http://thescrappinrabbit.blogspot.com/
Katrina: http://scrappyhorses.blogspot.com/
Michelle S.: http://cricutcrazyscrapper.blogspot.com/
Diane: http://happyscrapperdiane.blogspot.com/
Friday, July 25, 2014
Super Hero Gift Bag for Exploring Cricut and More!
Hello and happy Friday. I for one am glad the weekend is near!
My project for today is for Exploring Cricut and More! A fun blog devoted to creating crafty projects using all of our different die-cutting machines.
My project for today is using my Cricut Expression machine and my new Create a Friend Cartridge. This is the first time I have used the universal overlay and it worked out great, so easy.
The super hero is on page 37 and cut at 7.0" including the layers and I used the word image cut at 2.50" for the tag.
This cartridge has some really cute images, I am looking forward to making more soon.
Thank you for stopping by today, I hope your weekend is fabulous and you check back on Monday at Exploring Cricut and More! for a special challenge you will not want to miss!
Monday, July 14, 2014
Crafters Choice! Challenge at Exploring Cricut and More!
Welcome to another challenge over at Exploring Cricut and More!
Summer is in full swing....I am enjoying our time of less structure and trying to relax a bit more. But, I have to say that it sure is busy around here and my dreams of spending lots of extra time crafting doesn't seem to be happening as I had hoped. So this challenge was just perfect....how simple is this one??
Challenge :“Crafters Choice” Make a card, layout, or paper craft with at least two die cuts on it.
I am sharing a sign I made for the graduation party.
Using the Life's a Beach cartridge I created this "No Shoes, No Shirt, No Problem" welcome sign.
I cut the letters at 3.75" and the images were cut at 5.0" including the layers.
A couple more pics of the table decor.
Thank you for stopping by today. Take a few moments to create a project of your choice for our challenge at Exploring Cricut and More!
Friday, July 11, 2014
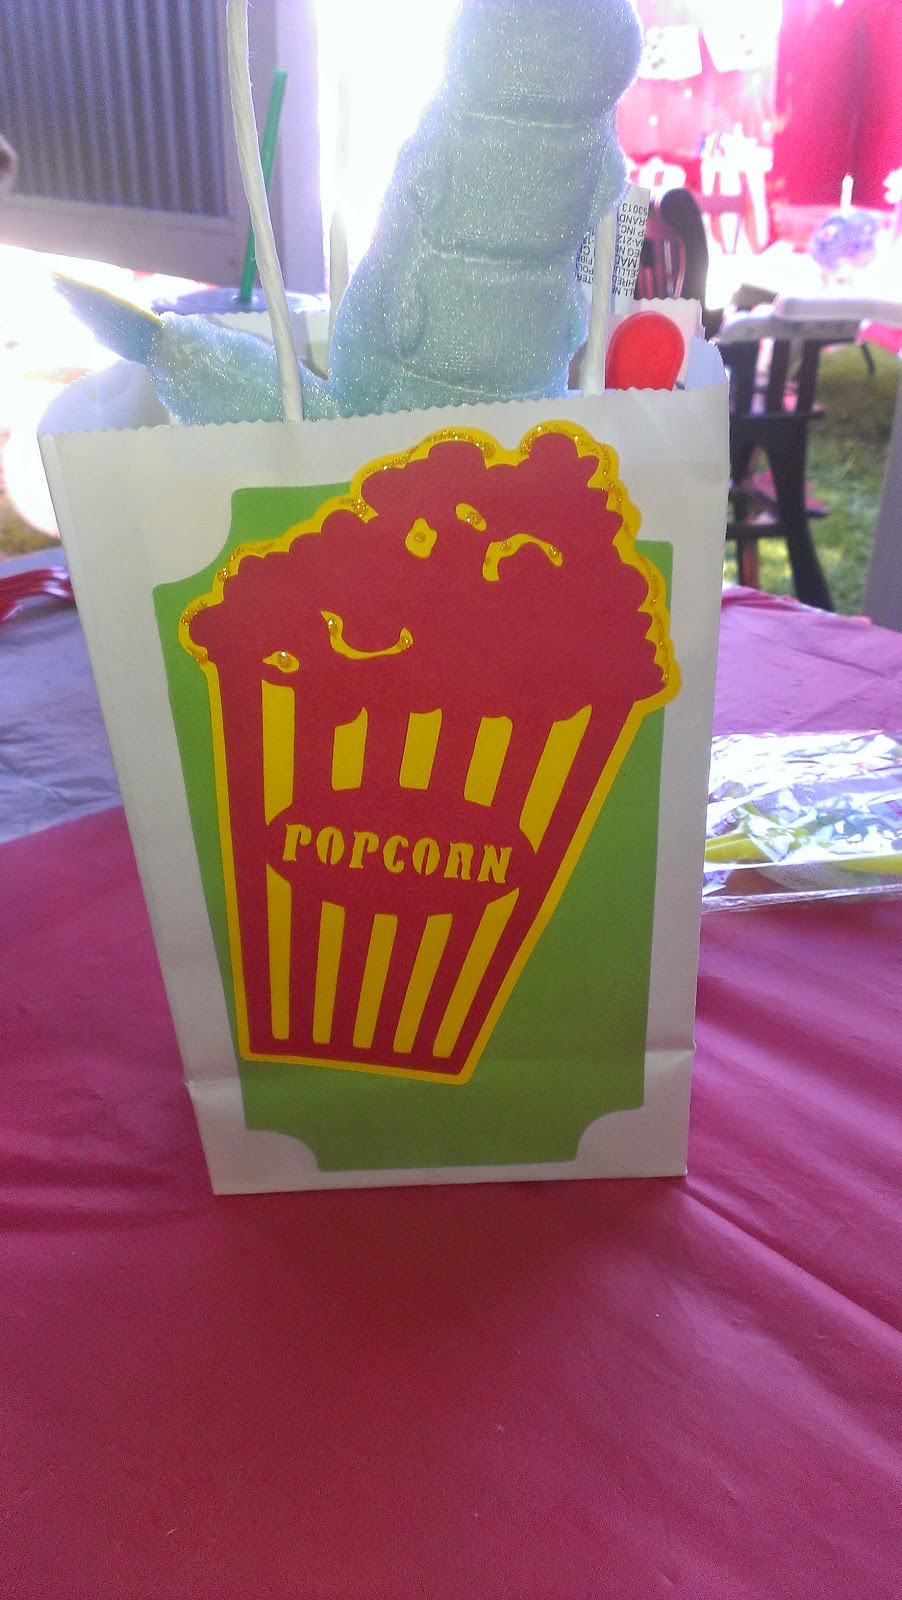
Carnival Goodie Bags for Exploring Cricut and More!
Happy Friday everyone!
I am back again today with a fun little project I recently made for a carnival themed birthday party for a friend's grand daughter.
I created these from the Carousel Lite Cartridge
The images were cut at 6.5" including the layers. The Lite cartridges are great for projects that need to be massed produced because there aren't many layers. Each bag had the ticket booth on one side and a food image on the other and since I had to make twenty of these I kept the extras to a minimum.
Thank you for stopping by today, I hope you have a crafty weekend and please check back on Monday for a new challenge at Exploring Cricut and More!
Tuesday, July 01, 2014
Special post for Exploring Cricut and More and Expressions Vinyl!
Good morning my crafty friends. Diane over at Exploring Cricut and More!is showcasing some very creative and beautiful projects she made using Expressions Vinyl
You must take a moment and head over there to see these amazing 4th of July creations!
I for one love working with vinyl, but her projects took it to a whole other level of excellence!!
And best of all...
To help you get started with this, Expressions Vinyl and Exploring Cricut & More will give a $25.00 gift certificate. You must leave a comment here and be a follower of our blog. Remember, you can find us on Facebook and Pinterest too. Most of all, be sure to head over toExpressions Vinyl and check out all the different vinyl and colors. They even have tutorials to show you how to do your projects. Don't forget we have a challenge this week too. Winner will be picked from the comments with random.org and you have till Saturday, July 5 to check us out. I will announce the winner of the certificate at the time we announce the Top 3 Crafters for the challenge.
I do thank you for stopping by today! Be sure to check out Diane's special post!
Monday, June 30, 2014
Vacation Challenge at Exploring Cricut and More!
Happy Monday!
Today begins a new challenge at Exploring Cricut and More!
Our challenge is: “Vacation” create a card, layout, or paper craft for vacation and use a sign of some kind (stop, beach, gas etc)
We are planning our annual camping trip with friends and family so I am starting to make some goodies to take along. I am starting with these super fun and easy to make "build your own s'more goodie bags"
All of the images were cut with the Camping Critters Cartridge using the sign feature.
Sign and layers cut at 2.25"
Critter cut at 2.75"
So, how about you? Have you had a chance to take a little trip or have one planned?? Perhaps you will be inspired to create a project for this challenge!
Be sure to check out Exploring Cricut and More! for some wonderful creative ideas from our Design Team.
Have a wonderful crafty week.
Friday, June 27, 2014
Flip Flop Goodie Bags for Exploring Cricut and More!
Good morning everyone!
I am happy to be posting today for Exploring Cricut and More!
We recently celebrated Sara's high school graduation with a double party that included my nephew from Florida.
Because our graduates are pretty nontraditional....our party and decor was nontraditional as well.
It was a beach party in our backyard. I needed to keep the goodie bags pretty simple as there were so many details to attend to.
I pulled out the Life's a Beach cartridge once again to create these little flip flops. They really do cut beautifully and assemble in a snap.
These are cut at 1,5" I didn't add alot of details, some simple gem, washi tape and glassine bags. The sentiment was created on the computer and I just created a banner and inked the edges.
I thought I would share a little bit of the food pics as well. Our daughter Rachel made the cake, my sisters, girlfriends and I had fun making the pineapple palm tree centerpieces and the shark watermelon.
Thank you for stopping by today and be sure to check back on Monday for a fun new challenge at Exploring Cricut and More!
Monday, June 16, 2014
Challenge time at Exploring Cricut and More!
Good morning and happy Monday!
Today is the start of a new challenge at Exploring Cricut and More!
This week's Challenge “Wedding”! Create a card, layout, or paper craft for a wedding using the colors black and white with a splash of one other color.
What do you think? Fun right? I love a challenge and this was a good one. Deciding on the image and accent color took some thought for me!
We have a couple of weddings coming up in our family and I thought it would be fun to try these little bride and groom boxes found on the Tie the Knot Cartridge.
Groom box cut 7.5"
Bride box cut at 8.5" and each box had one layer.
I didn't add to many accents, just some embossing and pearls.
I hope you will take a look at Exploring Cricut and More! and see what the wonderful DT has created to inspire everyone!
Subscribe to:
Posts (Atom)