Hello everyone and Happy Saturday.
I have a little St Patrick's Day project using my Cricut Imagine and printed vinyl.
My daughter gave me a tea pot for Christmas and because it was green I thought I could alter it a bit for a perfect centerpiece
I used Celebrate with Flourish Cricut Lite Cartridge for the shamrock images and Imagine More Cards for the colors and patterns. I simply used all of the layers at 3.5" each with a different color or pattern. I also cut just the shamrocks again for the other side of the tea pot. Working with vinyl is always fun, but to add the printed element makes it even better.
I added some flowers to use it as a vase.
Still working on the rest of the table decor for Sunday:)
I thought this project would be fun to enter over at Exploring Cricut's Luck of the Irish Challenge
Hello, welcome to "Kindred Kreations"
This blog is about our life at home, and away from home... everyday happenings, and special occasions. We enjoy a variety of pastimes, but our main joy is making "Kindred Kreations". Thank you for joining us in our journey of growing together through faith, family, love for learning, projects, and more.
Saturday, March 16, 2013
Saturday, March 09, 2013
Simple Critter Cards
Just a couple of quick thank you cards using the Create a Critter Cartridge. I just love this cartridge for easy-to-assemble images that are adorable.
I made them 4x4 PTI Vintage Cream cardstock and cut the images cut a 2 3/4". Since the cards were small, I was able to use my scraps for the background paper. I used a punch to create the bottom borders as well as scallop and circle punches for the sentiments. (which are from My Pink Stamper's Punnylicious set). Just a bit of ribbon and stickles for some sparkle and that was it. I made several as I used them for thank you notes so they needed to be simple.
Wednesday, March 06, 2013
Winter Sports Card
Hello everyone, I haven't blogged much in a while, but the projects have been forth coming.
I can say I have busy with Project Life and I really enjoy the simplicity and recording the everyday moments.
I am hoping to have a blog post maybe weekly with a way to incorporate my Cricut machines. I know they are not typically used much for Project Life, but maybe finding some simple word art and images may be helpful.
I'm thinking even if I can devote a couple of hours here and there to finding images and getting them cut-out and/or assembled would be handy for my weekly pages.
I would love to hear your thoughts and suggestions.
For today's post:
I used the Dude Cricut Lite Cartridge for this card. My daughter Rachel and her fiance Richard have birthdays just a few days apart, so their gift this year was a lift ticket to a local ski resort so they can snowboard for a day. I thought this card would be perfect. The paper is from Recollections and I also used my Cuttlebug, distressed and inked the edges a bit.
The sentiment is from Pink by Design Just 4 Men stamp set
Hope your week is going well.
Challenge entry: Party Time Tuesdays #110 Die Cuts
Check out the crafty inspiration!
I can say I have busy with Project Life and I really enjoy the simplicity and recording the everyday moments.
I am hoping to have a blog post maybe weekly with a way to incorporate my Cricut machines. I know they are not typically used much for Project Life, but maybe finding some simple word art and images may be helpful.
I'm thinking even if I can devote a couple of hours here and there to finding images and getting them cut-out and/or assembled would be handy for my weekly pages.
I would love to hear your thoughts and suggestions.
For today's post:
I used the Dude Cricut Lite Cartridge for this card. My daughter Rachel and her fiance Richard have birthdays just a few days apart, so their gift this year was a lift ticket to a local ski resort so they can snowboard for a day. I thought this card would be perfect. The paper is from Recollections and I also used my Cuttlebug, distressed and inked the edges a bit.
The sentiment is from Pink by Design Just 4 Men stamp set
Hope your week is going well.
Challenge entry: Party Time Tuesdays #110 Die Cuts
Check out the crafty inspiration!
Wednesday, January 23, 2013
Peachy Keen Challenge 13-3: 3D Objects and Bears!!
Good morning everyone, today I am posting my first Valentine project of the year. A sweet little bear made with the Peachy Keen January Stamp Kit of the Month that features oh so many cute Valentine sentiments and goodies.
I stamped her on kraft cardstock with Rich Cocoa Memento ink, used a white gel pen for some detailing and added glossy accents for some shine. I did a bit of paper piecing with the other images and stamped in red, cut out and added to the bear. A bit of doodling with a red pen to give her bow some polka-dots and Candy Cane Stickles on the little heart.
The white bag started plain and I made my own patterned image using various images from the same stamp set. The heart is cut from a Nestabilities with some paper from the DCWV Celebration stack. It's a bit glittery too.
Be sure to head over to see the projects, so much talent, I am always amazed at what everyone comes up with. Peachy Keen Challenge Blog
Have a wonderful Wednesday everyone!
I stamped her on kraft cardstock with Rich Cocoa Memento ink, used a white gel pen for some detailing and added glossy accents for some shine. I did a bit of paper piecing with the other images and stamped in red, cut out and added to the bear. A bit of doodling with a red pen to give her bow some polka-dots and Candy Cane Stickles on the little heart.
The white bag started plain and I made my own patterned image using various images from the same stamp set. The heart is cut from a Nestabilities with some paper from the DCWV Celebration stack. It's a bit glittery too.
Be sure to head over to see the projects, so much talent, I am always amazed at what everyone comes up with. Peachy Keen Challenge Blog
Have a wonderful Wednesday everyone!
Tuesday, January 22, 2013
Banner/Bingo Baby Cards
Here are another couple of baby cards I made using many of the same elements as the previous baby cards, but with a "bingo" twist. I thought this made them a bit whimsical and have a vintage feel all in one. The bingo card is from My Creative Time's Anyday Bingo and Crossword set. These two cards can be for either a boy or girl, I just made each one opposite.
Paul over at More than Favors is having a Wacky Wednesday Challenge: Create a Banner
Be sure to check out the projects.
Paul over at More than Favors is having a Wacky Wednesday Challenge: Create a Banner
Be sure to check out the projects.
Saturday, January 19, 2013
Baby Cards!
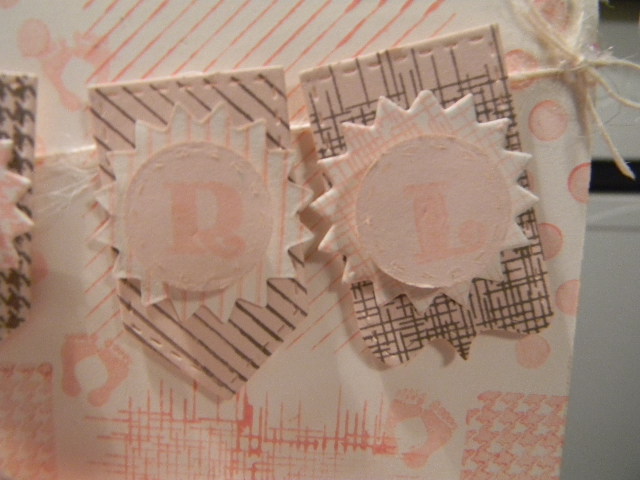
These darling little cards started with PTI Vintage Cream Cardstock and My Creative Time's Build a Banner Kit . I made my own background with PTI Sweet Blush and Spring Rain ink using the stamps from the banner set. The letters are very subtle, not too dark. I was going for delicate. Momento Rich Cocoa was also used .Sweet Blush and Spring Rain cardstock from PTI for the banner, stamped and layered pieces. The letters for "boy" and girl" are from My Creative Time's Anyday Bingo & Crossword stamp set. I finished with some PTI ribbon in the same colors and a bit of button twine also from PTI.
I so wish I could take better photos, but these will have to do:)
I thought this would be fun to enter Pause Dream Enjoy Challenge #1: Use Ribbon
I so wish I could take better photos, but these will have to do:)
I thought this would be fun to enter Pause Dream Enjoy Challenge #1: Use Ribbon
Thursday, January 17, 2013
Thanks Snow Much! for the Exploring Cricut Challenge
Still working on those thank you notes!
These snowman cards were fun to make and pretty easy. I used the Winter Frolic for this cut, the sentiment is from My Pink Stamper's Winter Punnies. Such a cute set. The paper was from my scraps, except the card base and that is from Recollections.
Exploring Cricut Baby I'ts Cold Outside Challenge!
Head on over and see what the design team came up with. Really cute projects!
These snowman cards were fun to make and pretty easy. I used the Winter Frolic for this cut, the sentiment is from My Pink Stamper's Winter Punnies. Such a cute set. The paper was from my scraps, except the card base and that is from Recollections.
Exploring Cricut Baby I'ts Cold Outside Challenge!
Head on over and see what the design team came up with. Really cute projects!
Wednesday, January 16, 2013
More Cupcake cards
Here are a few more little cupcake cards I created. I have decided that since my card stash is pretty much depleated I need to make them in quantities for awhile.
I used a cupcake themed 6x6 pad and Peachy Keen Stamps Everyday Character Assortment for the cute little faces on the cupcakes. The sentiments are from My Pink Stamper's Cupcake set. I purchased that set a year or so ago and have been wanting to use the cute little sentiments.
Tuesday, January 15, 2013
Peachy Keen Challenge:13-2 Sketch
Cupcake Birthday Card
Hello my crafty friends, today's post is a sweet little cupcake card I made with Peachy Keen sketch challenge in mind. I had a little bit of a different take on where the sentiment is placed. This little card is for a little girl turning 6, I think it's a bit busy, but little ones seem to like that:)
I found this cute little 6x6 paper pad full of cupcakes. I couldn't resist. I used the Everyday Character Assortment for the cupcake and used some "bubble" paper for the background and stamped little Peachy Faces on that as well.The banner is cut from a Spellbinder set and haven't used much, but love how it turned out. The sentiment is from the Peachy Keen January Stamp of the Month. I just joined and am really excited to receive some crafty inspiration each month. Be sure to visit the Peachy Keen Challenge Blog
for some fun projects and inspiration.
(I would also like to find a scrapbook kit of the month club but I don't even know where to start. Any suggestions? I like the idea of having papers and embellishments from different companies, but when I do a search, it's pretty overwhelming.)
Hello my crafty friends, today's post is a sweet little cupcake card I made with Peachy Keen sketch challenge in mind. I had a little bit of a different take on where the sentiment is placed. This little card is for a little girl turning 6, I think it's a bit busy, but little ones seem to like that:)
I found this cute little 6x6 paper pad full of cupcakes. I couldn't resist. I used the Everyday Character Assortment for the cupcake and used some "bubble" paper for the background and stamped little Peachy Faces on that as well.The banner is cut from a Spellbinder set and haven't used much, but love how it turned out. The sentiment is from the Peachy Keen January Stamp of the Month. I just joined and am really excited to receive some crafty inspiration each month. Be sure to visit the Peachy Keen Challenge Blog
for some fun projects and inspiration.
(I would also like to find a scrapbook kit of the month club but I don't even know where to start. Any suggestions? I like the idea of having papers and embellishments from different companies, but when I do a search, it's pretty overwhelming.)
Thursday, January 03, 2013
Personalized Vinyl Project with the Cricut
Happy Thursday everyone, today I had a little time with the boys to create a personalized project for each of them.
I purchased these little stools at IKEA a while back with the intent of personalizing each for the boys.
I used Cuttin' Up Cartridge for the font and cut the letters at 4"
The dolphin and whale were cut using the Splish Splash Cricut Lite Cartridge. There were only a couple of cuts so it made layering with the vinyl easy. I really love working with vinyl, the finished projects are always so fun. I used the vinyl I already had in my stash. It's definitely time to replenish some colors. I really could've used some light blue.
The boys of course love anything with their name on it, so these were a big hit.
I purchased these little stools at IKEA a while back with the intent of personalizing each for the boys.
I used Cuttin' Up Cartridge for the font and cut the letters at 4"
The dolphin and whale were cut using the Splish Splash Cricut Lite Cartridge. There were only a couple of cuts so it made layering with the vinyl easy. I really love working with vinyl, the finished projects are always so fun. I used the vinyl I already had in my stash. It's definitely time to replenish some colors. I really could've used some light blue.
The boys of course love anything with their name on it, so these were a big hit.
Tuesday, January 01, 2013
Welcome 2013!
Hello everyone, hoping all of you had an amazing new year's eve. It was pretty quiet here. My hubby and I welcomed in the new year with Seth dozed off between us on the couch. Such a cutie, he made it until after 11! We toasted with a bit of champagne, thankful for another year together with our family and health...knowing that at anytime that can change. It truly is a gift.
I made this little champagne bottle tag so we could welcome in the new year with a bit of fun.
I used the Stretch Your Imagination Cartridge with the blackout and silhouette feature. I cut it twice at 7"
and trimmed the bottom so I could give some dimension to the bow and bottom of the stem. Glossy accents gave it shiny liquid-like look, while the little gems were just for some blingy fun.
The wine-bottle tag is a die from PTI.( I actually purchased it last summer to make tags for 100 water bottles for a wedding I helped with. ) I used a cuttle bug folder on the die and the sentiment is cut using an EK Success label punch with a sentiment from My Creative Time's Mixed Holiday Sentiments Set
This is my entry at Exploring Cricut's last Challenge of 2012! New Year's Celebration!
I made this little champagne bottle tag so we could welcome in the new year with a bit of fun.
I used the Stretch Your Imagination Cartridge with the blackout and silhouette feature. I cut it twice at 7"
and trimmed the bottom so I could give some dimension to the bow and bottom of the stem. Glossy accents gave it shiny liquid-like look, while the little gems were just for some blingy fun.
The wine-bottle tag is a die from PTI.( I actually purchased it last summer to make tags for 100 water bottles for a wedding I helped with. ) I used a cuttle bug folder on the die and the sentiment is cut using an EK Success label punch with a sentiment from My Creative Time's Mixed Holiday Sentiments Set
This is my entry at Exploring Cricut's last Challenge of 2012! New Year's Celebration!
Subscribe to:
Posts (Atom)