Here's the last baby shower project post. I didn't photograph the favors or a couple of other projects, but thought I would post the first project which was the cute little invitation I made.
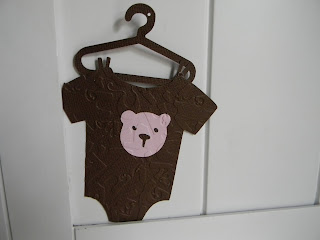
I started with PTI cardstock and the Straight from the Nest cartridge, I cut the clothesline image along with the layers. Instead of using the images for the front of the tshirts, I used brads and a stamped image. I used the Swiss Dots folder and ran the layer through the Cuttlebug. I added some PTI ribbon and heat embossed (with pink embossing powder) the sentiment which is also from a PTI set. I inked the clothesline and added jute to make it a bit more realistic. The hardest part was being happy with the design, I kept adding and changing until I finally had it just right. I decided in the end the three little pink pearls in the corner were the perfect finishing touch. I also added a heat embossed pink monkey to the brown envelope.
Coming soon...Bridal Shower projects.
Hope your Sunday is relaxing. Thanks for stopping by.
Hello, welcome to "Kindred Kreations"
This blog is about our life at home, and away from home... everyday happenings, and special occasions. We enjoy a variety of pastimes, but our main joy is making "Kindred Kreations". Thank you for joining us in our journey of growing together through faith, family, love for learning, projects, and more.
Sunday, April 22, 2012
Friday, April 20, 2012
Experimental Boxes
Hello there,
Just thought I'd post a couple of boxes created from the Tie the Knot cartridge. One is dry embossed the other just left by itself. I loved how each came together so quickly. If one was doing a mass production, these would be good choices in my opinion. Fancy no....Easy yes... No glue!!
I have noticed in my crafting, I am definitely an event kind of person. Whether it be a shower, birthday, wedding or just because, I tend to be the queen of quantity!
A couple of thoughts:
*Try to find the paper at a reasonable price. Either plan ahead or use the coupons, and of course the "stacks" can be a good choice as all colors are coordinating.
*Find a size that you can fit at least two to a page, this creates less waste, time spent and cost.
*I notice I am willing to put in the extra time to emboss or embellish, especially if you use what's already on hand makes it cost effective, but that doesn't have to be the case. Think outside the box with textured paper and other easy extras.
I know that I love to look at your blogs for ideas and inspiration and sometimes it's nice to be reminded of little tips or tricks.
Thank you. Have a great weekend. I'm looking forward to posting the Bridal Shower projects I have been working on.
Thursday, April 19, 2012
Simple Wedding Favor
Good afternoon everyone. Just thought I'd post a quick wedding favor I did for my girlfriend's recent wedding in beautiful (and at the time snowy)Lake Tahoe. The venue was a small chapel overlooking the lake, and it was in the middle of one of the biggest snow storms of the year. So picture the snow falling in the background, just stunning.
I only had a little over a week to come up with 60 of these so I kept the design a simple pillow box cut with my Expression using the Easter Solutions Cartridge from 2010 and the hide feature with my Gypsy to hide the bunny cutout. I sized these at 5" so I could get two favors per 12x12 page. I used my scallop and circle punches to create the layers for the outline and initial. I heat embossed with black powder and dry embossed the other images for additional texture. I used a PTI stamp set for the outline and the "P" is from My Creative Time's Everyday Bingo set. I filled them with a Ghiradelli Chocolate square, just big enough to only need one per box.
Thank you for stopping by.
Wednesday, April 18, 2012
Baby Shower Cartridge Project: Rock a Bye Baby
Ok everyone, getting close to the end of baby shower projects. I thought I would share the banner I made....
Since mommy to be hadn't settled on a name and I thought welcome baby wouldn't do, I decided on "Rock a Bye Baby". The Baby Shower Event Cartridge has a rock a bye baby phrase. I cut it using the fit-to-page feature on my Expression and cut the words apart. There's also a banner feature on the cartridge, so I cut that as well. To embellish I used some prima flowers and half pearls. The patterned paper is from Graphic 45. I did ink the edges and ran the letters thru the Cuttle Bug for some extra texture. It was fun to make and added a nice touch. I still have trouble photographing banners though.
Thank you and have a great day.
Tuesday, April 17, 2012
Another Baby Shower Project: Remember the clothespin game?
Good morning all,
I still have a few baby shower projects left to show you. I know when I am planning events I love to see what others have done for inspiration...
This one was my take on the ever popular clothes pin game (you know, the one where guests can "steal" your pin if you say the forbidden word...I always lose mine right away:)
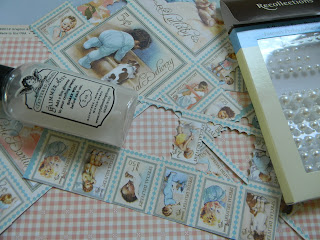
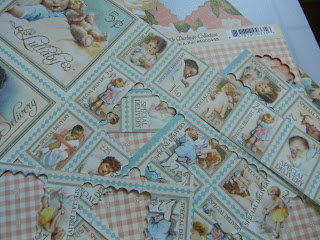
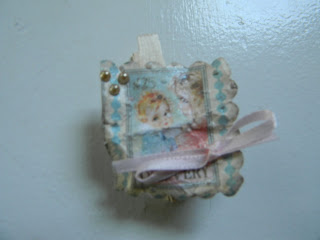
I started with some clothespins and decided they needed to be embellished some how. I happened to be a my local scrapbooking store and found this yummy Graphic 45 paper. I used a square scallop punch for the images and inked around the edges a bit. Used a little mister to wet the squares, crumpled them up, smoothed them out and sprayed them with Glimmer Mist. After they dried I added tiny half pearls and a little pink bow. I was going for a bit of a vintage look.
I have several left over and not sure what to do with them, they're just too cute to get rid of.
This last photo is of an activity for the guests. Instead of a bunch of games, I had the guests create a quilt square for the new baby. I just set up a little table in the corner of the room and strung the fabric squares across using some jute and little clothespins. We provided fabric markers and fabric paints. My girlfriend and I are supposed to make the quilt before baby comes, we better get busy.
Thought this would be fun to share over at Sarah Hamer's Tuesday Link Up Party
Monday, April 16, 2012
Quick Mother's Day Project: Altered Bag using the Cricut Imagine
Good morning and Happy Monday,
The weathr here in Northern California feels like spring is finally here.
I thought I would link up to My Pink Stamper's blog hop challenge...We are to create a Mother's Day themed project.
I started with a gift bag, added the "mom" cut out with the Mother's Day 2010 cartridge and the lovely floral images using my Imagine Enjoy the Seasons cartridge. Sara wanted to help with this one so she added the lovely pearls all over and I do mean all over... and of course her favorite...stickles. I was happy to have her want to do a project together. I also used a My Pink Stamper's sentiment from her Fruit and Veggie Puns stamp set. I used a scallop punch, added a PTI button, twine, ribbon and inked the edges. I really need to use my Imagine more, the projects are so very quick and easy.
Sunday, April 15, 2012
Baby Shower Cricut Cartridge project
This baby shower gave me the perfect excuse to purchase the Baby Shower Event Cartridge for my Cricut. I cut this cute little carriage using the Fit to Page feature key. It was pretty simple to put together, with only one layer that I ran through the Swiss Dots Cuttle Bug folder. I filled this one with potpourri (pink of course) and put it in the bathroom along with a little pink candle. I also made a little banner with "baby" in the middle to hang across the vanity mirror. The picutre didn't come out so great, but you get the idea. I made a couple of other carriages and filled them with mints to set around the house.
Thank you so much for stopping by and for your sweet comments that make my day
Have a happy Sunday.
Saturday, April 14, 2012
Baby Shower continued: Corsages
I just love the little extra details when hostessing a gathering. I decided corsages for the mommy to be, grandma, 2 great grandmas and the 2 big sisters would be fun project. I needed to keep it cost effective, so they were homemade (of course). I bought one bunch of light pink roses and one bunch of carnations and a bit of filler.
It's amazing what a little floral wire and tape can do. I kept it simple, added some ribbon, beaded garland (from the wedding section at Joannes), plastic baby pins and little floral pins to some of the blooms.
I decided to personalize them by printing the sentiments on my computer and using a couple of scallop punches. I glued them to toothpicks and added them to the corsages.
My girlfriend pinning on her daughter's corsage
Making sure Mickie's gets pinned on too.
Pinning on one of the big sister's corsages
Have a wonderful Saturday!
Friday, April 13, 2012
Baby Shower Cake using the Cricut Cake
My daughter Rachel made the cake for the baby shower. One layer was a chocolate cake with a strawberry mousse filling, and the other a white cake with a lemon custard filling. She flavored the fondant with a bavarian creme. Pretty tasty. She makes her own marshmallow fondant which seems to cut great in the Cricut Cake machine.
I'm not a cake decorator, but I can use the Cricut Cake to make the designs. The cute little monkey was made using the Create a Critter cartridge.
I'm not a cake decorator, but I can use the Cricut Cake to make the designs. The cute little monkey was made using the Create a Critter cartridge.
I thought I would include a few more pics of the food! After all, that's the best part right?
The watermelon "carriage" came from the Celebrations Cookbook from Taste of Home, in fact I made the whole baby shower menu from that book. It was quite the undertaking but so worth it. I am thankful for all of the help I had! Cheers to a loving family and girlfriends!
Thursday, April 12, 2012
Baby Shower Project #1 Garland
Good Morning,
Thought I would post a project I made for a sweet baby girl shower I gave a couple of weeks ago for a dear friend's daughter. This will be baby girl number 3.
Her colors were pink and brown and she is decorating with little monkeys too.
I used the Straight from the Nest Cartridge border feature cut fit to page, then cut the little "shirts" apart and ran them through the Cuttlebug for some embossing to create the garland. I also cut the little hangers and clothespins. To assemble the garland, I used some jute, punched a tiny hole in the top of the hangers and strung each one onto the jute. Between each little t-shirt, I tied a piece of pink and brown tule to give it a little extra something. Theses strands of garland were strung about the house and over the cake table. I thought this would be fun to enter over at More Than Favors Wacky Wednesdays "baby theme" Challenge.
Wednesday, April 11, 2012
Let's try this again.
Good morning and it's good to be back.
Lot's of interesting twists and turns that the path of life takes us down. Always changing with many peaks and valleys.
I've been busy with many projects and hope to be able to post them soon.
I have enjoyed visiting your blogs over the past few months still seeing what everyone is up to even though I wasn't able to post over here.
Have a wonderful and blessed day.
Subscribe to:
Comments (Atom)


